Showing posts with label Awesomeness. Show all posts

New Tool - ZBrush Batch Ops

This is the third from-the-ground-up iteration of a ZBrush toolkit I released early 2019, and improves on the popular base functionality of the earlier kit with new scope limiting options, dockable UI and additional functions. 

As ever, the core of the tool deals with performing batch operations on all your subtools- I get the most use out of it when I'm first importing a model OR when I'm getting ready to export it for baking. 

The renaming and color ID assignment tools have been expanded to include new functions:

  • Find and replace subtool name elements. 
  • Reset materials on subtools. 
  • Apply a random color per folder. 

 Mesh options have been expanded to include batch options for:

  • Polygroup assignment
  • Crease assignment
  • Face visibility management. 
  • Batch baking all layers. 
Finally a tool I personally find really cool, but I don't know if anyone else will find useful- "Batch It Crazy"
  • Batch ANY BUTTON that you can find the path for. 
  • ... so if the button exists on the subtools you are managing you can press CTRL and hover over the button and find it's path.
  • Enter that string when prompted...
  • And that operation will be applied to every tool in the scope. 
As a promotion of the tool use this link to get $5 off the price (and as a thank-you for reading my techie blog!)


RenderDoc

Probably familiar to any TA or Engineer who deals with their graphics pipeline, RenderDoc is a tool I have found incredibly useful for debugging graphics in Unreal.

Formerly a Crytek internal graphics debugging tool, it was released to the public in 2014. The tool is developed by Baldur Karlsson, and it boggles my mind that a tool this gosh-darn useful has been given to the public for free. Kudos to Baldur and to Crytek.

Previously I was using NVIDIA Nsight to view and debug runtime atlased textures, and it was quite slow and somewhat unintuitive to sift through the outputs to find what I was after.

RenderDoc on the other hand is not only fairly straight forward to get running, the turn around time to get meaningful output for frame-debugging is extremely rapid.

For Ue4 integration I'm using Temaran's RenderDoc Ue4 plugin, which makes frame captures in game as simple as entering a command on the command line- RenderDoc.CaptureFrame

Check it out if you need to know more about your graphics pipeline.

GDC 2016- San Francisco Coffee places

Wait, what? 2016 already? I have not been as pro-active in this whole blogging thing as I could have been, so for now let me make it up to you all by letting you know where to find the good stuff while you are perusing the talks at GDC 2016.

Near the Moscone Center:

Special Xtra


One of my favorite places. Great coffee to get your energy back after a long talk about rigging (try the New Orleans iced coffee for a real kick). If you get there in the morning, grab one of the croissants fresh out of the oven. The staff are great, and could probably give you a bunch of pointers on good places to check out in the area.

Elite Audio and Coffee Bar


Because what goes better together than coffee and high end audio systems? Sure. Anyway, this one is very close to the Moscone, but will probably be packed full of people, so keep that in mind. Cappuccinos here are great, and once again staffed by a good crew of people. They serve Neighbor Bakehouse pastries most days, and those alone are worth checking out.

Sightglass Coffee


Great coffee, and also a good opportunity to take home a San Francisco local roast. A little bit of a walk from the Moscone, and there will probably be a line either way, but well worth the walk. Once again, Neighbor Bakehouse pastries. Eat them!


Chrome Industries


Continuing the trend of a store that sells something (in this case high end cycling gear) but also serves a decent roast, Chrome Industries is a short walk from the Moscone down 4th st. It's also near the Hotel Utah, which serves a different type of brew (worth checking out for beers!).


Not so near the Moscone Center:

Contraband Coffee bar

If you find yourself for some reason near the Polk street area, Contraband Coffee is nearby on Larkin and California. It's got good coffee and hot chocolate. The snacks are good too, but it's worth checking out Flower and Co. nearby or MyMy for a real meal. I have seen Neighbor Bakehouse pastries here too. See a trend?

The Interval


If you find yourself near Fort Mason, the interval is a good place to stop by. Good coffee, provided there aren't too many people around. The crowd can occasionally be a bit of a downer.


Four Barrel Coffee 

If you find yourself in the mission, check out the four barrel coffee place down there. I've heard mixed opinions about the Four Barrel coffee, but I'm a fan. Delicious! Being on Valencia St, its also surrounded by a bunch of excellent places to go grab lunch or dinner.

The Mill


The Mill serves four barrel coffee, as well as that whole thick toast thing. The toast is good I guess, but I really go there for the coffee- that's really good. They sell bread too which is pretty damn good bread, although carrying that around the conference floor might not work out so well.


So that's some places to get you started- have you found any that you think should be on this list? Also, hit me up you you want to meet up for coffee and talk game dev stuff. As you can tell, I like coffee.

Scratch Pad Unity Utility.

One of my friends has made his Unity Asset Store debut with "Scratch Pad"- a handy little utility that lets you bookmark scenes, animations, scripts etc.


It always kinda bugged me that you can't put files into your favorites area of the Project panel, which is something this Utility does pretty well- being able to make 'working sets' of files is pretty useful, especially when debugging all the different components that might make up a single asset in game.

Check it out here. 

Do you want to play a game?

My Chrome browser split in half last night and asked me if I wanted to play a game. Saying yes turned my browser into a pseudo python console. Apparently Google has been tracking my search history and seen that, yeah, I like Python. Ok, having the browser window suddenly split open because someone is watching your search history is vaguely creepy, but what the hey, I do like Python!

Why do they want to play a game with me? I don't know, its Google. Why did they make Google maps into Pac Man? Its Google. They do stuff like that.

The first challenge was to take an equation as a string and parse it into reverse polish notation. After thinking about it today I was able to write a passable parser that will probably make any real mathematician twitch- but it works and the code doesn't make me twitch.

The challenge was, well, challenging, but fun! It reminds me a bit of the Project Euler challenges, except this one gives you a hopping bunny when you succeed. An animated ASCII hopping bunny.

Why?

Pac Man

Hop little bunny. Hop for joy!

GDC 2015- Coffee Places!

Because I assume almost every game company runs on coffee, and Technical Artists are surely no exception, here is a list of great coffee places in close proximity to the GDC.

SightGlass Coffee:
Short walk from the Moscone center down Folsom Street- not really many food options, but excellent coffee.
www.sightglasscoffee.com/our-company/locations 

Special Extra:
Small coffee cart. The staff are all cool, once again not much in the way of food beyond muffins, but I rate the coffee as some of the best in the bay area. Its down the alley next to the MOMA (building under construction across the street from Yerba Buena park), so its about a five minute walk from the Moscone center.
http://www.yelp.com/biz/special-xtra-san-francisco

Epicenter Cafe:
Good food (lunch, breakfast), beers and good coffee. Also has a batman board game that looks like its from the '70s. I've always wanted to play it, but have never had the chance...
http://www.epicentercafe.com/

Elite Audio:
Another blue bottle cafe- a little hit and miss, but on the balance usually good coffee. They have the same pastries that Sightglass gets, but not as expansive a selection. This is also a five minute walk from Moscone.
http://www.eliteaudiosf.com/menu/

Chrome Cafe:
This is a bit more of a walk, about on the same scale as Sightglass. Tiny cafe, but good, strong coffee. Serves four barrel coffee, which is pretty good.
http://www.yelp.com/biz/chrome-coffee-bar-powered-by-cento-san-francisco

There are a few others, but those are my go-tos. I've also got bars and places to eat if anyone wants suggestions. Give me a shout if you want to catch up and talk coffee/scripting during GDC week.

Google Spreadsheet: Script to Change Row Background Color on Cell Edit

Now for something a little different! Google Spreadsheets!

Here is a little script I cooked up today for changing a row color in Google Spreadsheet when you change the contents of a drop down menu.

When you change the contents of a cell in the designated "status" column the entire row will change it's background color to match whatever rule you have defined in the switch statement.

A useful addition to this would be the ability to automatically find the status column in whatever sheet you have open, but it was beyond the scope of what the script was meant for, so here is it in the raw!

/**
Google Sheets Script to modify a row's color based on the 'Status' entry. 

This script uses the onEdit() method, which is called every time a cell is edited.

The statusColumn variable's cells are assumed to be a drop-down with the following options:
Complete
In Progress
Not Started
Revisions Req
Blocked

The script modifies a row's color based on the contents- leaving the color white if it's not matched by an expected type.
*/

function onEdit() {

    var sSheet = SpreadsheetApp.getActiveSpreadsheet().getActiveSheet();
    var statusColumn = 8; // Status column index

    // As this is called onEdit() we don't want to perform the entire script every time a cell is
    // edited- only when a status cell is mofified. 
    // To ensure this, before anything else we check to see if the modified cell is actually in the status column.
    if (sSheet.getActiveCell().getColumn() == statusColumn) {
        var row = sSheet.getActiveRange().getRow();
        var value = sSheet.getActiveCell().getValue();
        var col = "white"; // Default background color
        var colLimit = 15; // Number of columns across to affect

        switch (value) {
            case "Complete":
                col = "MediumSeaGreen";
                break;
            case "In Progress":
                col = "Orange";
                break;
            case "Not Started":
                col = "DarkGray";
                break;
            case "Revisions Req":
                col = "Gold";
                break;
            case "Blocked":
                col = "LightCoral";
                break;
            default:
                break;
        }

        sSheet.getRange(row, 1, 1, colLimit).setBackground(col);
    }
};

New Photoshop Exporter- ExportThis!

After a long and (mostly) successful run of controlling Photoshop with Python, I decided to take a stab at writing a fully integrated Photoshop Extension, this time using the native Javascript based API.

The end result is a cleaner, smaller and all round better Photoshop tool that does a number of kinda cool things.

Export This!
Some of the User-facing features
Because its written to take advantage of the native API there is a significant difference in app size- Texture Monkey being almost 40mb when including all the additional GUI and Python library files it required, vs a 29kb .ZXP installer for ExportThis. The ZXP is easily distributed, and uses Adobe Extension Manager CC to install/update/remove itself. 

Within the tool, the document template system was added to allow artists to easily make documents that would be compatible with the exporter (as a lot of it is group name/hierachy based) but I expanded on it to allow artists to make and save their own particular document setups too. 

I chose JSON files for the templates, user configuration and project definitions due to it's ease of use- and the fact that it can easily be read by anybody. This turned out to be a little bit of a challenge, as Javascript is generally blocked from accessing any local files, as well as the Asynchronous nature of Javascript itself meaning that sometimes your functions end up being called before you have any data to read.

In addition to the trouble with reading files, another odd little challenge popped up due to Javascript supporting JSON parsers out of the box and Javascript Extended completely lacking any. I got around this using the eval feature in order to read the JSON strings back into useful objects.

The tool uses the Adobe extension framework, which is made up of several components, each of which operate on different levels and have their own little quirks. 

The GUI is created in a very similar way to a web page, using HTML and CSS to define it's layout, content and internal behaviors. I was able to embed things like interactive help drop-downs using JQuery, as well as easily modifiable selection lists and other standard web-fare. 

Behind the GUI is a Javascript file that bridges the GUI to the actual Photoshop JSX extension. This is where it starts to get a little clunky, for three particular reasons:
  • This part of the tool has the same security restrictions imposed on it as any other web related Javascript code, for example, restrictions to the local file system. 
  • All calls to the actual Photoshop extension are passed as strings to evaluate (including arguments) meaning passing data back and forth between the extension and the GUI can be pretty cumbersome.
  • Javascript operates in an async manner. Due to this, the Javascript layer was kept very lightweight to minimize introducing any lame async related bugs. Although initially this lead to a little bit of head-scratching on my part, it resulted in a much easier to maintain tool, with all the heavy lifting confined to the Photoshop JSX engine. 
As I decided pretty early on that I wanted to use JSON files to store both user settings (such as the last project used, and their local project root) I had to figure out a way to be able to both read and write data from the tool, which I ended up doing on the Photoshop JSX side, which is the third component!

The Photoshop JSX (JavascriptExtended) file is where all the work actually happens- This is the part of the tool that can access the local drive, as well as drive Photoshop. I wrote it to contain a mix of environment definition and actual exporting functions. Any data sourced from the local drive that might be required by the GUI is read by the JSX and then passed back as a string to be parsed into a JSON object in memory. In a similar fashion, any GUI modified data is passed back as a string to be written back to the file system by the JSX. Lots of juggling!

The JSX also contains a component that can interact with the local system through the command line in order to check out elements from Perforce, using .bat files. 

(the hidden) GUIRilla, or a sprite exporter. 

Although the main focus of the exporter is Texture exporting for 3d models, an additional feature is the ability to author and export multiple 2D sprites from a single document. The exporter allows a "UI_SPRITE" flag document name prefix to be defined in the Project Settings, which will change the exporter to treat the document as a sprite atlas and export each group as a individual trimmed element, with transparency. It's pretty cool, but I'll go into this in a little more depth in another post, as its a whole other workflow. 

Overall, it was a fun exercise and the Artists using it have responded very well to it as a replacement for TextureMonkey. 

If you made it this far, hooray! Drop me a line if you are working with the Adobe Extension framework at all. Next up will be some tips for rapid iteration while working on extensions, and some of the terrible mistakes I made along the way...

Check in- Pete's Been busy...

Hello World,

I've been busy, so busy that I've been neglecting to blog. Luckily, some of what I've been up to is worth blogging about, so it works out.

At work, I've started a new position as a Senior Technical Environment Artist. If that seems like a long title, its because it is. I'm straddling a strange gap between grumbling about crappy tools and actually writing better ones. It's a great place to be, because I get to save myself tonnes of time and pat myself on the back about it at the same time.

Outside of work it was my birthday and something strange and computer-ey fell into my lap in the shape of a Raspberry Pi. We quickly became friends and I decided to make it a home.

Some Stuff about 3d Printing:

My Pi's new case.
Its my first attempt at industrial design! I created the case in Maya, based off of a CAD model of the Pi itself. I'm pretty surprised happy that the Raspberry Pi actually fits inside the case! Not only that, but it fits pretty damn well! I paid careful attention to how the case would open/close (its a two part slide) and how to access the GPIO pins.

Although this case works, its not quite where I want it to be. On the next version:
-I need to slightly adjust the positioning of the HDMI access point, and the Ethernet port which line up well enough to work, but could look better.
- The most disappointing part of the prototype is the complete failure of my light transmitting rods in the bottom right of the case... due to inaccuracies in printing these were not only very difficult to install, but also constantly mis-aligned due to the inherit flexibility of the transparent material used. These will be redesigned. Lame.
- Additional room will be added for the composite video output's metal sleeve. Not that anyone really uses them, but yeah. Its there. Why not make it work?
- Structural support will be given to the GPIO access point. Its kinda floppy at the moment, which makes the case feel unstable.
- The USB outputs will be flush with the case in the next version. This will increase the price of the model a little, but it will look waaay cooler, and also allow more air circulation inside the case.
- The text next to the LED status lights will be made bigger. Right now it prints more like Braille than text...
- Also... the next version will have bevels on the micro USB power port. Bevels are in right? Trendy.

The original design, soon to be updated!


Some stuff about code!

I've been continuing with writing tools in both CSharp and Python, and I've found as I learn and write more CSharp it's been making my Python code, for want of a better word, better. I'm a big fan of structure and readability, and while I've always been a fan of Python's flexibility, I feel it is a language that really gives you enough rope to hang yourself with.

Working with a language like CSharp that forces you to define the return type as part of the inherit properties of a method (even if its just void...) has really forced me to think about the way I approach my classes and methods in Python, and has resulted in my newer tools being leaner, with more modular logic and much more robust structure than my earlier ones. Yeah, I still love writing in Python, but now I feel a bit more confident that I'm not placing as many traps for myself in the future!

More stuff about 3d Printing:

Finally, my first color print!

I realized after the fact that the chicken leg in his knapsack does not present too well...
A speedy speed sculpt. With color!


Zbrush Speed Sculpt: Space Cop

I actually took a little over an hour on this one. Theme this week was space cop, so I made a space coppish thing.

"Space license please..."

3dPrint: Goblin!

I finally got this guy printed from Shapeways. It's the largest model I have printed so far, standing at 12cm. I was able to get the price down using a bunch of tools in MeshLab, Zbrush and Maya to ensure it had a physically accurate minimum wall thickness of 0.725mm throughout the entire model, reducing the material density to a crazy 1.87%.

The details held up pretty well. The only areas that didn't were the toe nails, finger nails and the chain-mail overall, which was expected.

The print stands at 120mm tall, and is printed in the Fine Polyamide (Nylon) material.


The render of the model from ZBrush. 

Unity4.3 Released

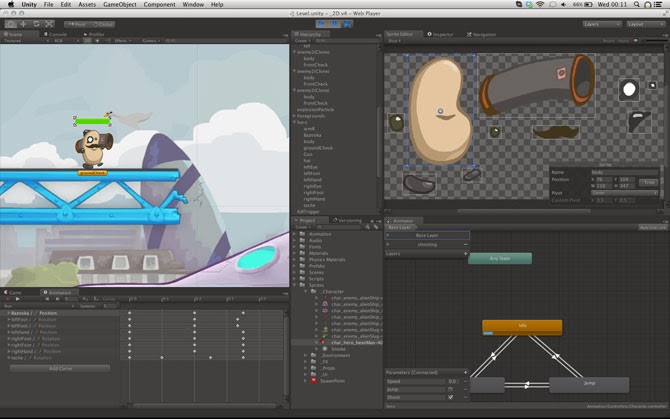
Unity 4.3 has just been released! As a Unity Developer this is awesome news, especially with the new native 2d toolkit that has been included with this release.

The new 2d tools... spritey goodness. 

We have been using the Unikron Software 2d toolkit for all of our sprites in game so far, and it is a pretty well fleshed out package, although a little cumbersome to use. I'm very interested to see how the new native 2d toolkit performs on mobile devices, and if it does perform well, what kind of workflow enhancements it will provide.


Zbrush Speedsculpt: Cup

I didn't choose this theme this week, but it was a great chance to abuse the radial symmetry brush for my own nefarious cup-theme related purposes. This was a true speed sculpt and was completed under the hour.

Yes. Technically a goblet is still a cup. 

ZBrush Speed Sculpt: "Worried"

I was meant to do this yesterday, but I have been spending most of my time writing an export script for our project. I was able to nab some time this morning before work to do a quick speed sculpt for the "Worried" theme.


ZBrush Speedsculpt: Blunderbuss!

The theme for this week was 'firepower' so I went with a Blunderbuss...

Note my hour was up before I could complete the flintlock mechanism... so this thing is pretty harmless. So much for firepower!

Need more flintlock thingy-mah-bobs!

3d Print- Wagon

Another 3d Print! This time the results not *exactly* what I was hoping for. 

This model is created using polished fine Fine Polyamide (Nylon), the same as my other prints but with an extra step- mechanical polishing. 

It was this extra step where things went wrong- the model is put into a little container with a large quantity of smaller stones, and vibrated to smooth the surface using mechanical abrasion. Unfortunately this process also takes a significant amount of surface material away, resulting in the thinner parts of the model either snapping or disintegrating all together. 

Although the quality on the majority of the model was pretty good some of the details on the front of the model were destroyed. The spokes on the wheels were also completely compromised. Apart from that, Its still an awesome looking model... might try fixing it with some putty!

Note the wearing down of the thinner elements of the model. Without the polish, these would have been pretty sturdy. 

ZBrush SpeedSculpt- Wagon!

Another Speedsculpt, made entirely in ZBrush primarily using Cube and Cylinder primitives, the clipping brush and the new Dynamesh features.

A Wagon. 

3d Print- Old Man Mathers, MG Turret

Just for fun I had a couple of prints done through shapeways of my recent speed sculpts. Both of these were printed in the White Strong and Flexible material- AKA Fine Polyamide.

Much of the original sculpt's details were lost in each case, but they have been valuable studies in how to make better prints in the future.


Rise of the Guardians- The Video Game

So... this is what I have been working on since leaving Bluetongue Entertainment in 2011:

KitchenSinkCube SKU coming soon...

Rise of the Guardians is finally out in North America on pretty much any platform you want. Almost any platform anyway. I was one of two level artists for the duration of the project, and I've updated my portfolio website with screenshots of some of my work. 

The game is based closely on the environs of the Dreamworks movie of the same name. In all there were roughly 35 levels that had to be created for the final game which meant that the turn around for each of them was pretty rapid. My favorite level to work on was the snowy Yeti Village. There is something really fun about making ramshackle bridges across deadly, deadly ravines:

The Yeti Village level from Rise Of the Guardians The Video Game.
The game was developed by Torus Games and published by D3Publisher. 


Cupco Games

Its awesome. 

A couple of very talented former co-workers from Bluetongue have created their own indie studio called Cupco games and have been very busy-bees (yeah, I had to do it) working on their first iOS title- Splat Attack! 


The game has been getting a good reception. If you are looking for a new iOS title (or even if you aren't!) Check them out!