PSD Metadata and Real time GUI updates.

It might not be the absolute best solution, but I have been able to put into practice my idea of storing the tool settings in the PSD metadata, and it actually works pretty well.

The current setup works like this:

  • On export, go through a dictionary of controls inside the GUI and check the settings. 
  • Store each object name and it's setting as a text block with easily splittable characters. For this I chose to use ~ and | as neither of these are used for windows file or directory names. 
  • Write this text block to the PSD metadata. 
  • Meanwhile, in the export, use the GUI's current settings to determine output locations, formats and files to include.  
To reload the settings:
  • A background thread is constantly listening for any changes in the current active Photoshop document. 
  • If the name of the document changes, it automatically kicks off a function that reads the metadata out of the active PSD and splits it into objectName, setting value pairs. 
  • If no data is found, it kicks off a process to apply default settings. 
  • This data is passed to another function that finds these QT objects, and applies the relevant setting recast as the applicable object type- eg bool, int, string.
  • These settings are only saved when the document is exported. I'm expecting a little grief from the artists about this if they switch documents before exporting them at least once, so I might try to fix it. 
The Stored Metadata, ready to be read back by the tool. 
With the listener process working on a pretty short timer and a very simple function, it's possible to get what feels like real time feedback in the tool without experiencing any lag or hangs. This is the first time I've made a tool where it's a two way street- usually it's just my tool telling Photoshop what to do. It's actually pretty satisfying to click between documents in Photoshop and watch all the checkboxes of Texture Monkey light up and change. 

Main settings to be saved are the different maps and resolutions associated with the various LODs, although settings for format and destination folders are saved as well. 


Texture Monkey... version"some big number"

We are now getting Perforce. Oh how I  missed thee Perforce! And what a fantastic opportunity to revisit my favorite pet project, Texture Monkey! Be be honest, I'm kinda sick of re-writing this tool, but I've got it to a point where it meets a couple of extra prerequisites that it was sucking at before, mainly:

  • It's written at a point where I actually feel I can competently write functional and readable code.  
  • It's UI uses the QT framework. Which it MUCH nicer to work with than the previous WX. 
  • It's been built around the premise that it  should easily be portable across projects without having to change any of the source code- provided afew assumptions about project structure are met. 
  • It does more than texture exporting, and now supports Perforce integration as well. 
  • Most importantly, it is written in a modular fashion, and can be expanded upon or cut back without too much trouble. 
Now with extra stuff!
Behind the scenes:
  • It stores and loads tool settings as metadata in each PSD file, so you don't have to select those settings again when opening the file later. In addition to that, if you change the settings, then export the file, these new settings are saved to the PSD for later use. 
  • It supports exporting multiple LOD textures for different asset bundles. This is an experimental feature, and may be cut. But its fun to play around with. The idea behind this is that Unity doesn't make a distinction between different IOS devices, and instead lumps them all into one category in it's asset settings, even though there is a significant difference in specs between devices. 
  • It brings Perforce into the tool chain. When it checks out whatever active document is in Photoshop, it also brings along with it all the associated exported texture maps, basing it's search on the export locations stored in the Metadata and the source file name. 
  • I'm still thinking about adding a check in function... I kind of want to get people to check in via the P4 client, just so they have an overview of exactly what they are checking in before they actually commit it (especially if things like models are dependent on the texture changes, but fall out of the purview of this tool) For now, I have just added a function that brings the P4 client to the foreground. 
  • I have tried to add a little flexibility for other artists to be able to use this tool. It's mainly aimed at people working on textures for models, but by adding custom destinations and formats hopefully it will be of some use to export to custom locations in different formats. 
  • The configuration is all stored as an .ini file, and contains all the file naming rules, default destination folders and stuff like that. It can be hand edited, but I don't think I'm going to bother with a custom UI at this point. 
  • The Style is one billion times better, mainly due to LoneWolf's dark orange stylesheet he has provided on tech-artists.org

Writing Metadata to a PSD file using Python

I want to save some tool specific information about a PSD file, but I don't want to have another pesky metadata file floating about to bloat my source texture folder.

Luckily, the PSD file format supports writing custom MetaData within it, which is perfect for what I want to do. In this particular example, I want my tool to be able to remember which folder the flattened image associated with this PSD will eventually be put into, the format the image will be in and the resolution.

There are many fields you can write to, but I have chosen to write to the Instructions information, because that just makes the most sense. Usually in Photoshop, you can see this fields available by going to the file info panel and going to the advanced tab:

In Python, we can access and write to the PSD's metadata very easily.

import win32com.client.dynamic as w32dynamic
w32 = w32dynamic.Dispatch

psApp = w32('Photoshop.Application')
doc = psApp.activeDocument

# When I pull this info out of the Metadata I split the | into
# a list of toolObjectName~setting pairs and then
# split these pairs into a tuple of strings (toolObjectName, setting)

settings = "chkBox_res_1024~True|export_dir~c:/test/my_doc.tga|rBtn_format_tga~True"

# Now to write this to the metadata
doc.Info.Instructions = settings

# If I want to get it back out...
settings = doc.Info.Instructions
print settings


I'm still experimenting with ways of storing the settings data in a prettier way, but so far this is working well for me, although the format and information I'm saving is *very* specific to the particular tool I am writing. Still early days... but hopefully the whole Metadata thing will be handy to other people out there.


Maya- Bake Vertex colors to Texture using Mental Ray.

This is a technique to get the Vertex colors from your model baked to a texture using a Mental Ray bakeset.

One method of getting vertex colors from a mesh to a texture is using the Paint Vertex Color tool's 'export' option under 'attribute maps'. This is pretty good for higher poly models, but falls apart on low poly models that might have vertex colors assigned per face rather than per Vert. On these models, the results will look muddy, as there are not enough verts to carry the info.

The other draw back of the Paint Vertex Color tool's export option is that it has no texture padding built in, so whatever colors you get out will be riddled with seams.

I like to use the Mental Ray bake sets to get lighting and color information from Maya to Photoshop. Although it doesn't handle vertex color straight off the shelf, its pretty easy to set it up by making a shader that reads the model's vertex colors.

On left- Sharp details preserved, padding enabled. On right, fuzzville. 
So, to set it up:

  • Make a new material and assign it to your model. I prefer lambert because I'm only after flat color. 
  • In hypershade, make a MentalRayVertexColors node. 

  • Click on the MentalRayVertexColors node. Under cpvSets in the attribute editor, click the button that adds a new item. 
  • Back in the HyperShade, bring up the shading graph of your material, and connect the MeshShape output of your object to the mentalrayVertexColorsNode input. 
  • Find the colorSet->colorSet[0]->colorSet[0].colorName attribute to the cpvSets->cpvSets[0] input.
That one. Over there. 
  • Now, you can use your Mental Ray bake set to bake out your colors by setting it to bake light and color. Did I mention there is padding as well? Well, there is, and its awesome.
  • This also lets you render your vertex colors in the Mental Ray Renderer, which is a cool bonus.  


Your final shading node should look something like this. Mind boggling.  

Model Monkey: Now with Configs!

I've decided to use ini files to make it easier to port my Maya exporter across different projects with as little fuss as possible, using the standard Python ConfigParser module. The last time I really played around with .ini files was to mess with Command and Conquer Red Alert, and that was some time ago. It's really awesome that the .ini file format is still worth using today.

There is a bug where you can add new file rules until the tool grows so long it is
bigger than the screen. Time to add a scroll bar...
Part of getting this to work includes creating a GUI interface to minimize the manual file editing that you might expect. Being my first major use of an .ini for a tool (I did use a teeny tiny .ini on Texture Monkey) I suddenly realized that I had to re-work a lot of my previous configuration code in order to make my tool flexible enough to be re-configurable without breaking into a million different lame parts.

BUT! It's working now, whoo! A couple of things have to be modified, but I can get info into the tool, change it, and get it back into the .ini again, rinse and repeat. In other words, I can now do what people have been doing for decades! Whoo etc. But hey, it works!


Unity4.3 Released

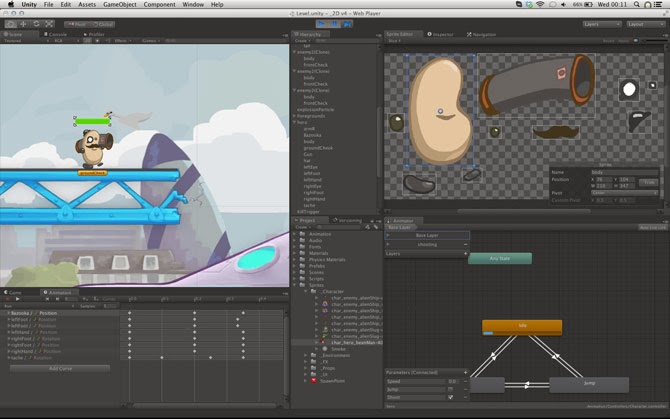
Unity 4.3 has just been released! As a Unity Developer this is awesome news, especially with the new native 2d toolkit that has been included with this release.

The new 2d tools... spritey goodness. 

We have been using the Unikron Software 2d toolkit for all of our sprites in game so far, and it is a pretty well fleshed out package, although a little cumbersome to use. I'm very interested to see how the new native 2d toolkit performs on mobile devices, and if it does perform well, what kind of workflow enhancements it will provide.


Maya Exporter: Tabs and Tools!

I've been chipping away at my Maya Exporter and have a few Photoshop functions tied into it now, along side the original exporter functionality.

Behind the scenes the Photoshop commands are built on Standard modules, using Subprocess and some string manipulation in order to get JavaScript commands to the Photoshop application. As the tool has expanded beyond it's initial export-only functionality, there has been a decent amount of clean up and re-factoring behind the scenes to make sure that it doesn't just turn into a mega-script.

Maya-side functions and Photoshop functions have been split into separate classes and files from the GUI, which has made keeping track of the code a lot easier.

The GUI is built using the Pyside QT Libraries, which comes standard with Maya 2014.

Next on the list, adding the option to load different project environments.